Getting started
Get a working TTMSFNCTreeView on screen in five minutes.
Add the component to a form
- Open your Delphi or C++ Builder project.
- In the Tool Palette, search for TTMSFNCTreeView.
- Drag it onto your form.
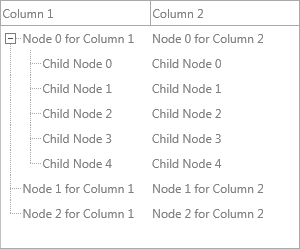
The component drops with three default columns and sample nodes already populated.
Add columns and nodes
uses
  FMX.TMSFNCTreeView, FMX.TMSFNCTreeViewData;

procedure TForm1.PopulateTree;
var
  n: TTMSFNCTreeViewNode;
begin
  TreeView1.BeginUpdate;
  TreeView1.ClearNodes;
  TreeView1.ClearColumns;

  TreeView1.Columns.Add.Text := 'Name';
  TreeView1.Columns.Add.Text := 'Year';

  n := TreeView1.AddNode;
  n.Text[0] := 'Delphi 12 Athens';
  n.Text[1] := '2023';

  n := TreeView1.AddNode;
  n.Text[0] := 'Delphi 11 Alexandria';
  n.Text[1] := '2021';

  TreeView1.EndUpdate;
end;
Add child nodes
uses
  FMX.TMSFNCTreeView, FMX.TMSFNCTreeViewData;

procedure TForm1.AddChildNodes;
var
  parent, child: TTMSFNCTreeViewNode;
begin
  TreeView1.BeginUpdate;

  parent := TreeView1.AddNode;
  parent.Text[0] := 'Embarcadero';

  child := TreeView1.AddNode(parent);
  child.Text[0] := 'Delphi';

  child := TreeView1.AddNode(parent);
  child.Text[0] := 'C++ Builder';

  TreeView1.ExpandNode(parent);
  TreeView1.EndUpdate;
end;
Respond to selection
uses
  FMX.Dialogs, FMX.TMSFNCTreeView, FMX.TMSFNCTreeViewData;

procedure TForm1.HookSelection;
begin
  TreeView1.OnAfterSelectNode := TreeView1AfterSelectNode;
end;

procedure TForm1.TreeView1AfterSelectNode(Sender: TObject;
  ANode: TTMSFNCTreeViewVirtualNode);
begin
  if Assigned(ANode.Node) then
    ShowMessage('Selected: ' + ANode.Node.Text[0]);
end;
Where to next
- Modes — virtual vs collection-based — choose the right mode for your data size.
- Columns and groups — autosizing, stretching, per-column appearance.
- Nodes — fixed/variable height, checkboxes, extended nodes.
- Interaction — editing, filtering, sorting, clipboard, drag-and-drop.
- API reference — full property, method, and event list.